
The I2P router has been around for quite a while. It is the largest peer-to-peer network next to TOR. Like TOR, I2P has its own domain names, instead of .onion, i2p uses .i2p. These are also known as “eepsites”. If you are familiar with the TOR browser bundle, you know that it comes with its own Firefox, ready to go after installation. While you can do this with I2P, I prefer being able to use my own browser instead of having to use a separate one. In my case, I use Brave which is based on Chromium, but any Chromium based browser will work fine.
- First thing we need to do is download I2P. You can grab it here.
- After you have installed I2P, make sure you start it. On Windows you have the choice of starting the router in the background, or with a window opened. Choose whichever is best for you, they both do the same thing. Here is a screenshot of the 2 icons that should be on your desktop (Windows 10)

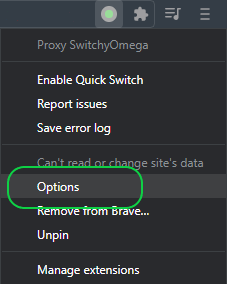
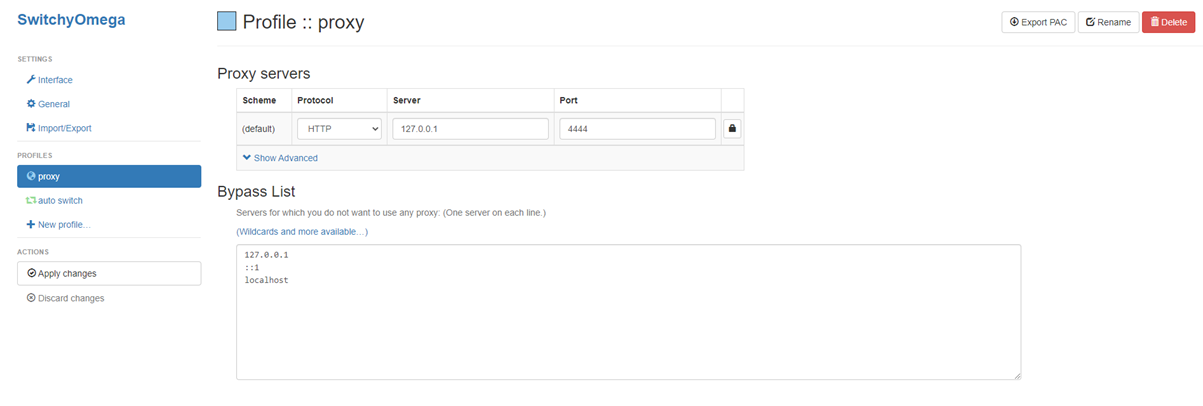
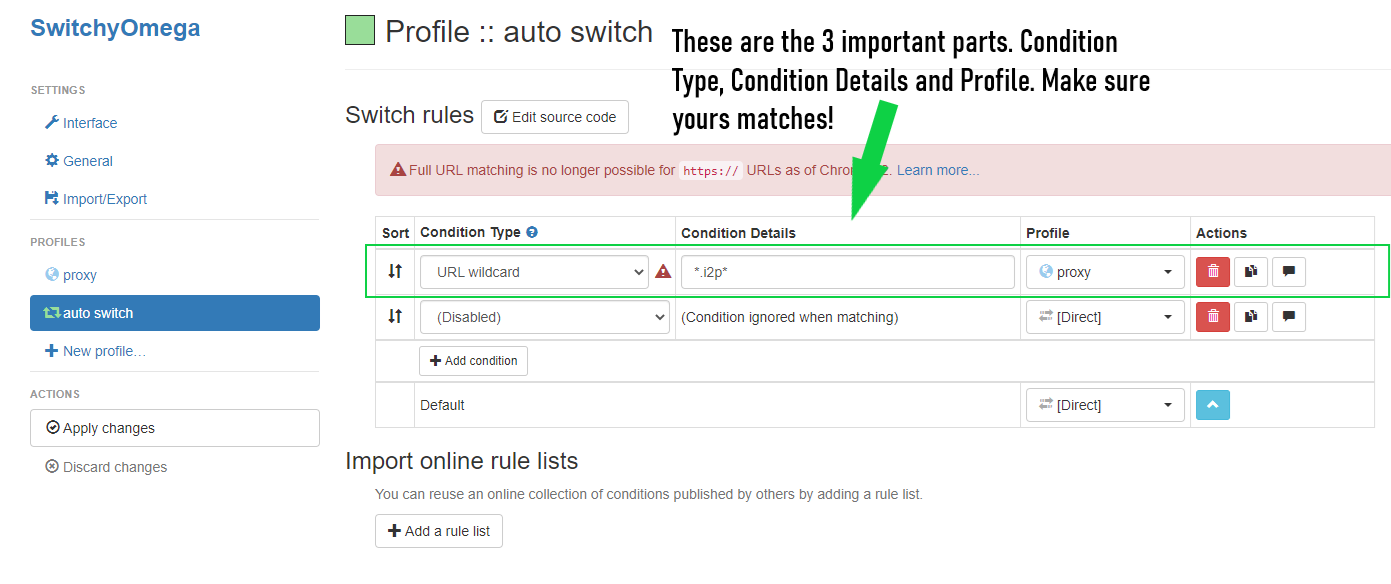
3. Once you have I2P running, we need to get an extension from the Chrome Webstore. This is the only way to get the desired result on Chromium based browsers since there isn’t a way to proxy i2p requests through i2p automatically built into Chromium based browsers. Luckily though, there is an extension for that! You can grab the extension that I have found works best & is extremely lightweight right here.
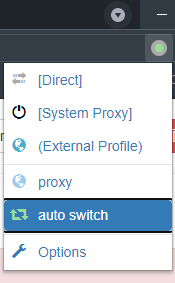
There you go! Now whenever you want to visit an .i2p domain, you can do so without having to use a new browser or having to manually input proxy settings every time. If you will be using I2P often, I highly recommend letting the I2P router run in the background. This will be much more convenient for you personally as well as helping out the I2P network itself. To do this, just click the icon that says “Start I2P (no window)”. You can also set it to start up when you boot Windows. Again, I2P is extremely lightweight and is not even noticeable, so there is really no reason not to let it run.
I hope you enjoyed this tutorial. If you have any questions please feel free to comment below!